Google Workspace
Read about Avion's SSO integration with a Google Workspace.
Avion supports Single Sign-On using Google Workspace and Cloud Identity through the generic OpenID connector. This guide will walk you through how to configure a Google Cloud Project and obtain the necessary configuration settings required for the integration.
Step 1: Choose your SSO provider
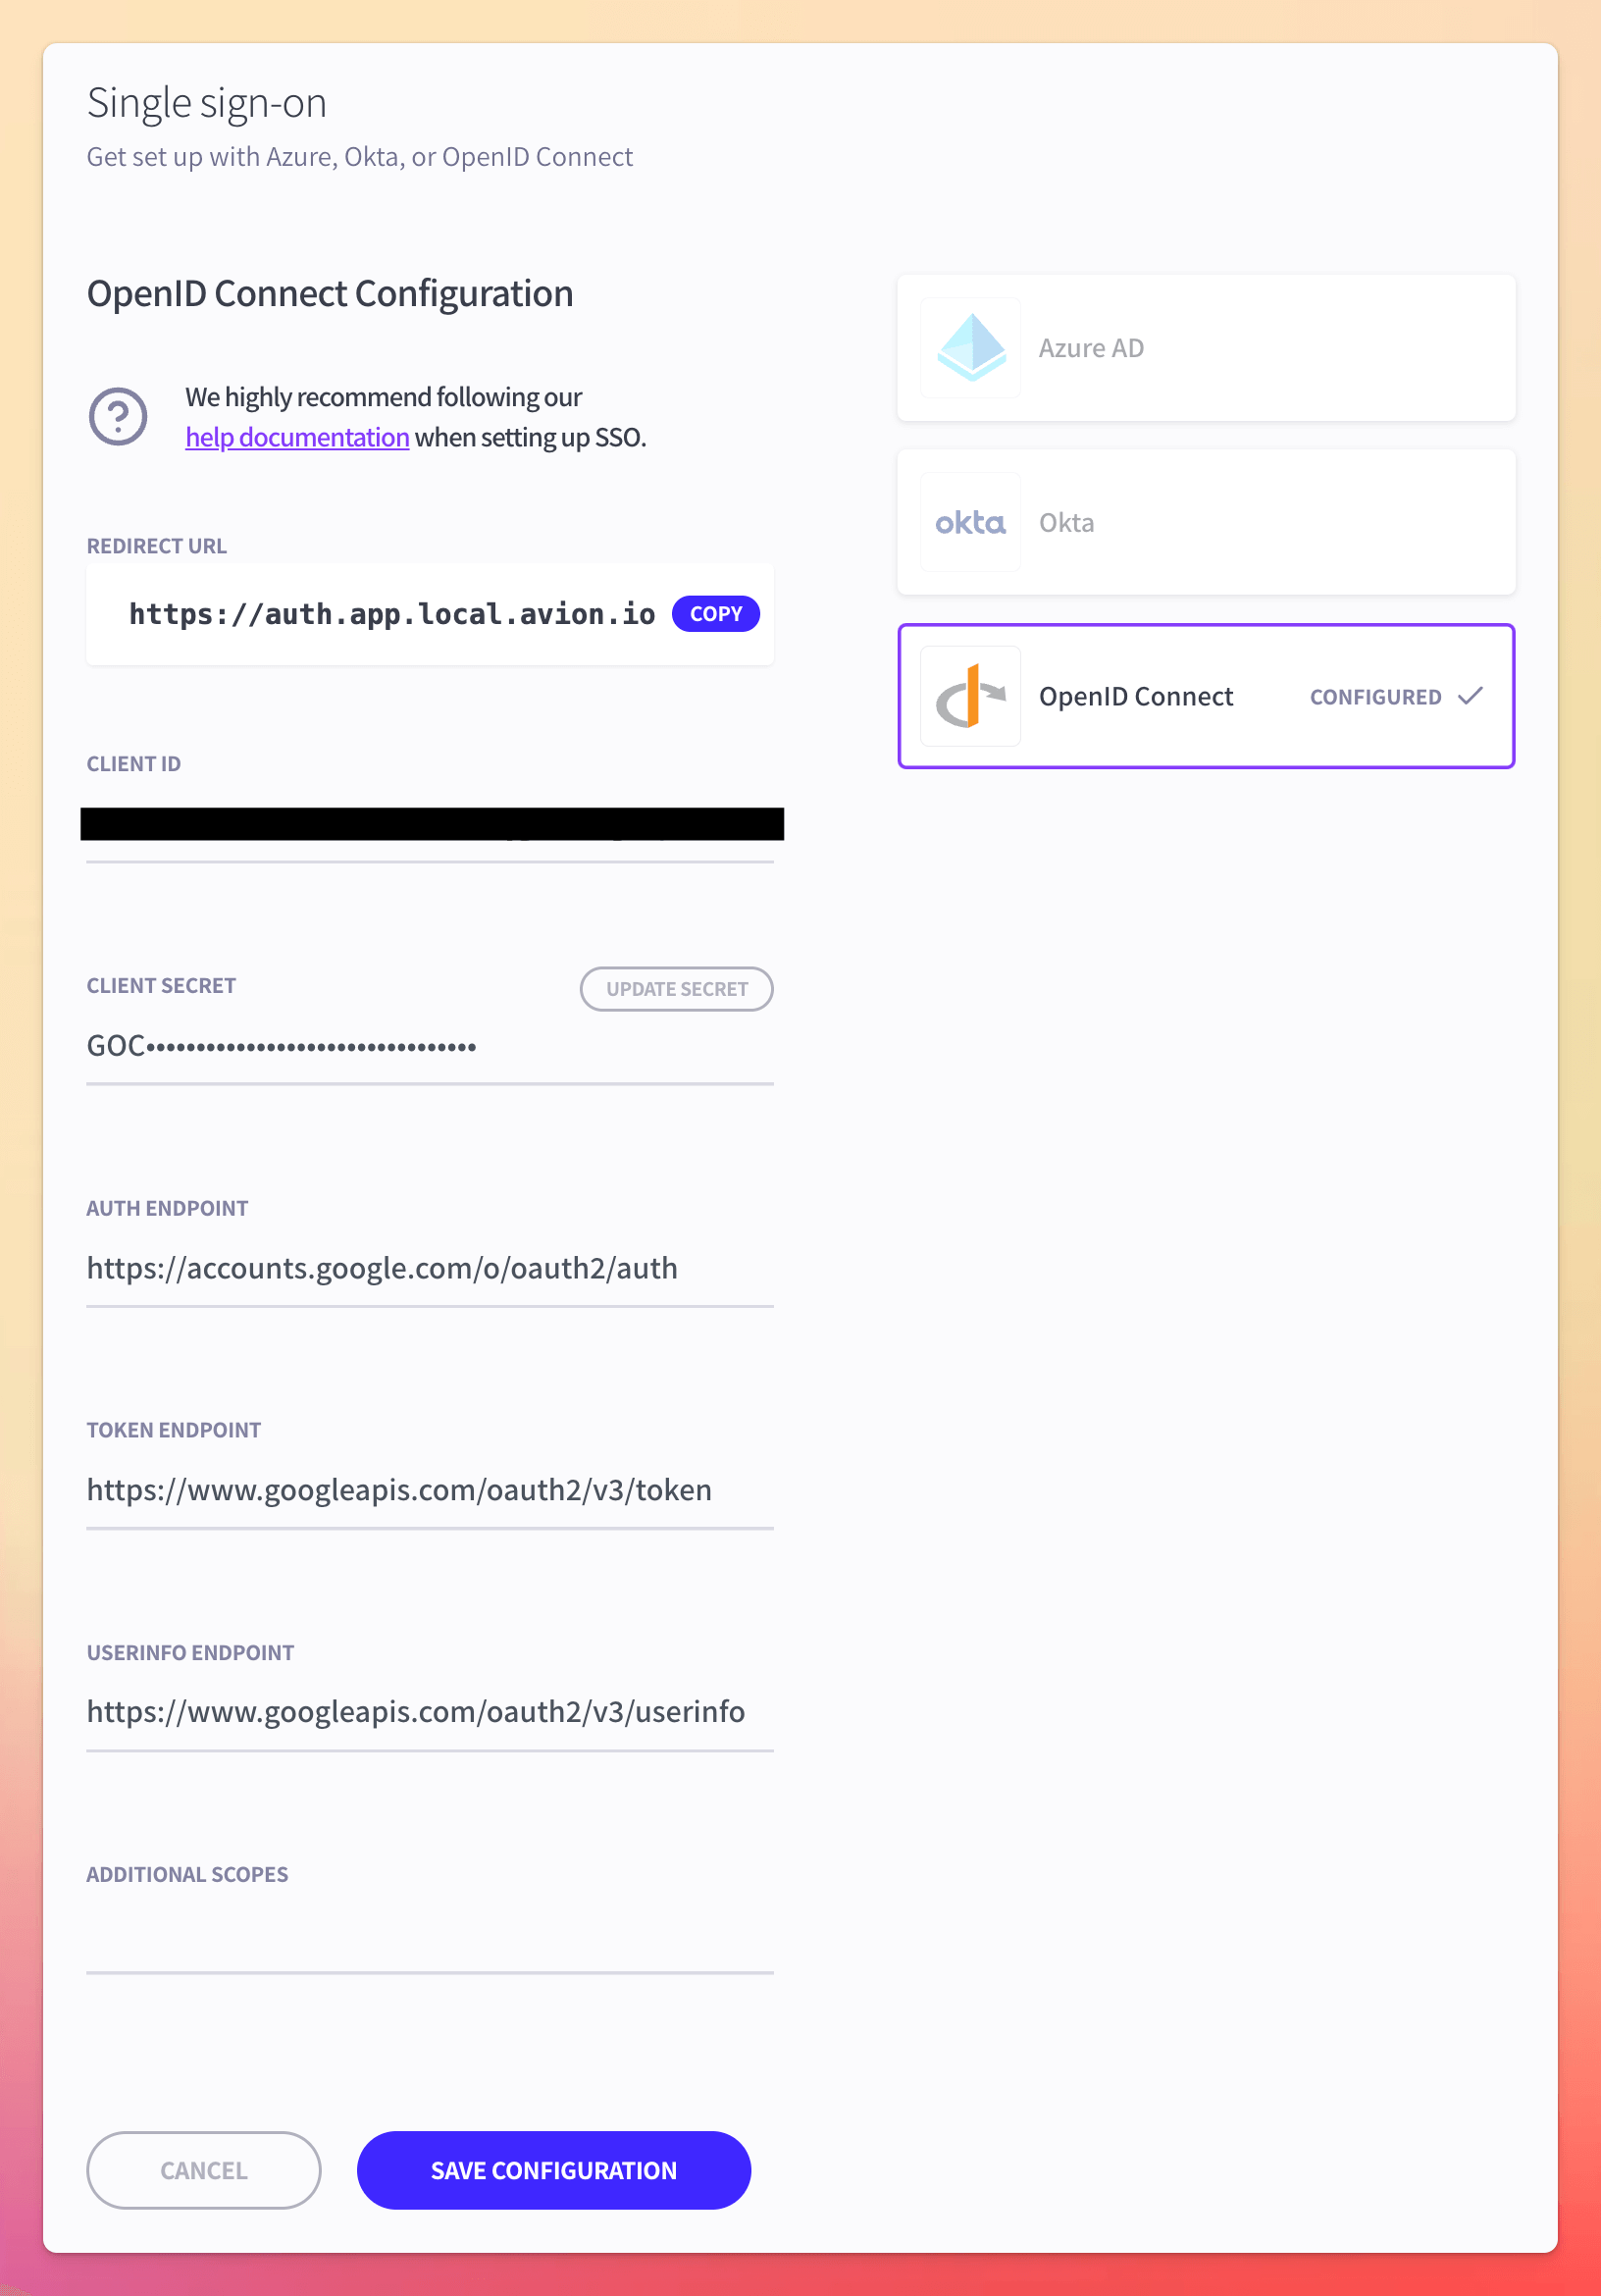
In Avion, go to your organization's Single Sign-On section. Select OpenID Connect from the list of available providers:

Step 2: Obtain OAuth 2.0 Credentials
We need to setup a new Google Cloud Project with OpenID configured as a credential so that we can obtain the following settings:
- Client ID
- Client Secret
- Authorization Endpoint
- Token Endpoint
- UserInfo Endpoint
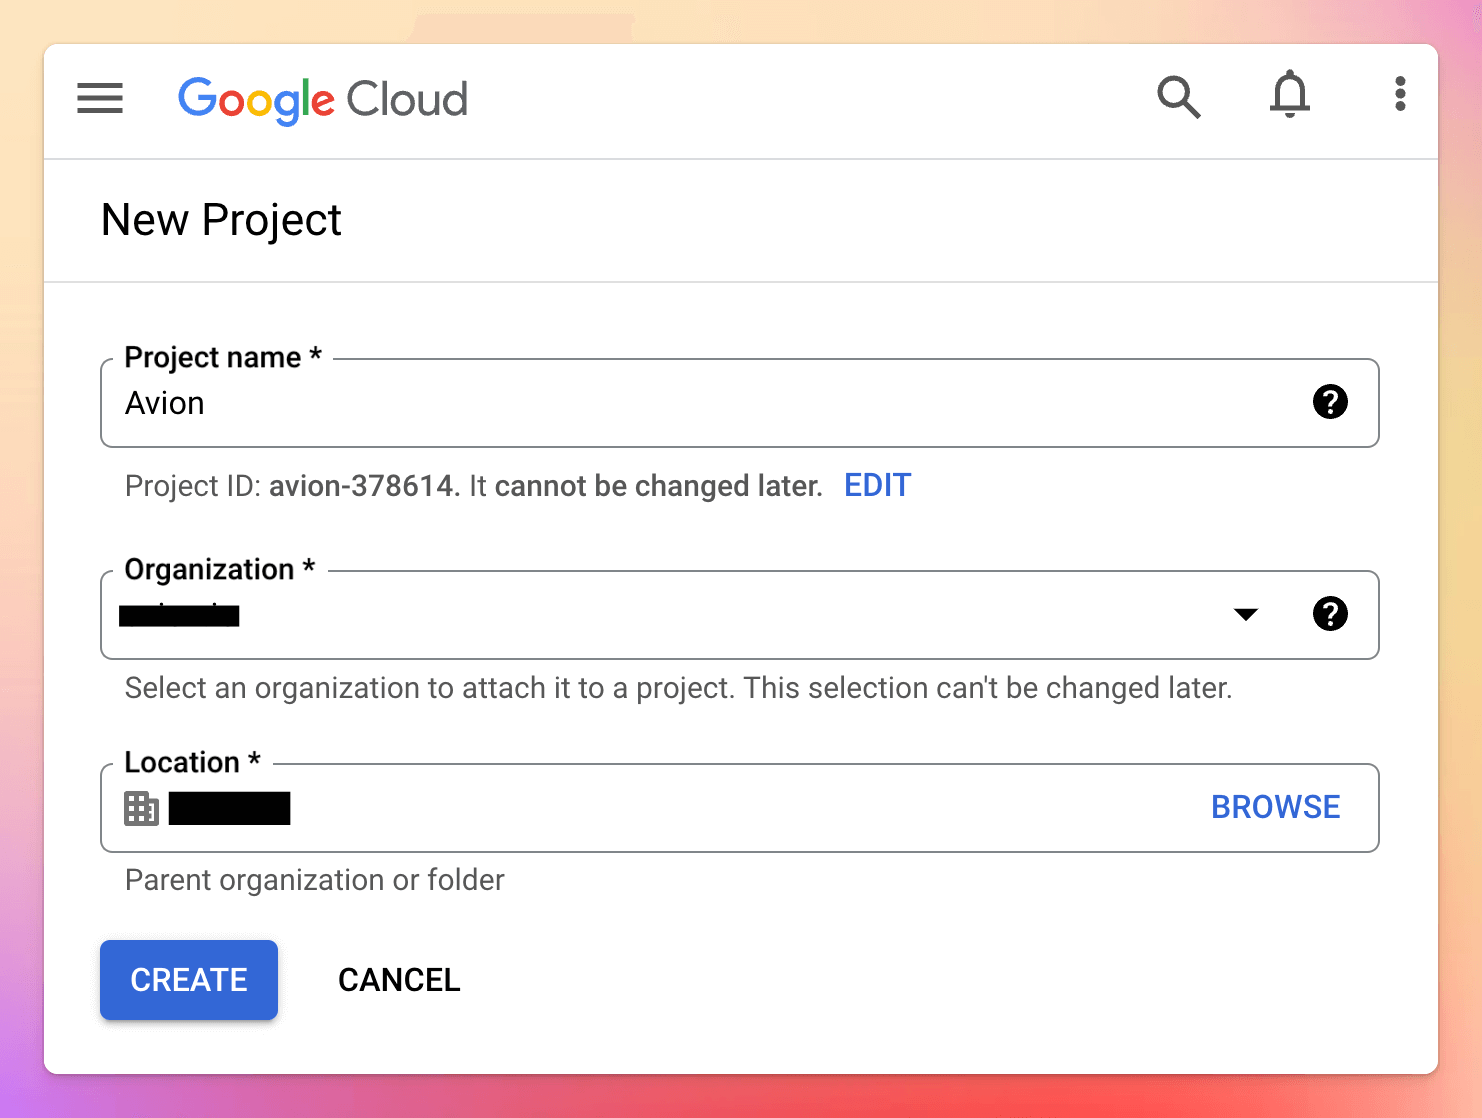
Step 2.1: Create a Google Cloud Project
- Go to your Google Developer Console dashboard for APIs & Services: https://console.cloud.google.com/apis/dashboard
- Click Create project
- Complete the form, ensuring you set the Project name to Avion
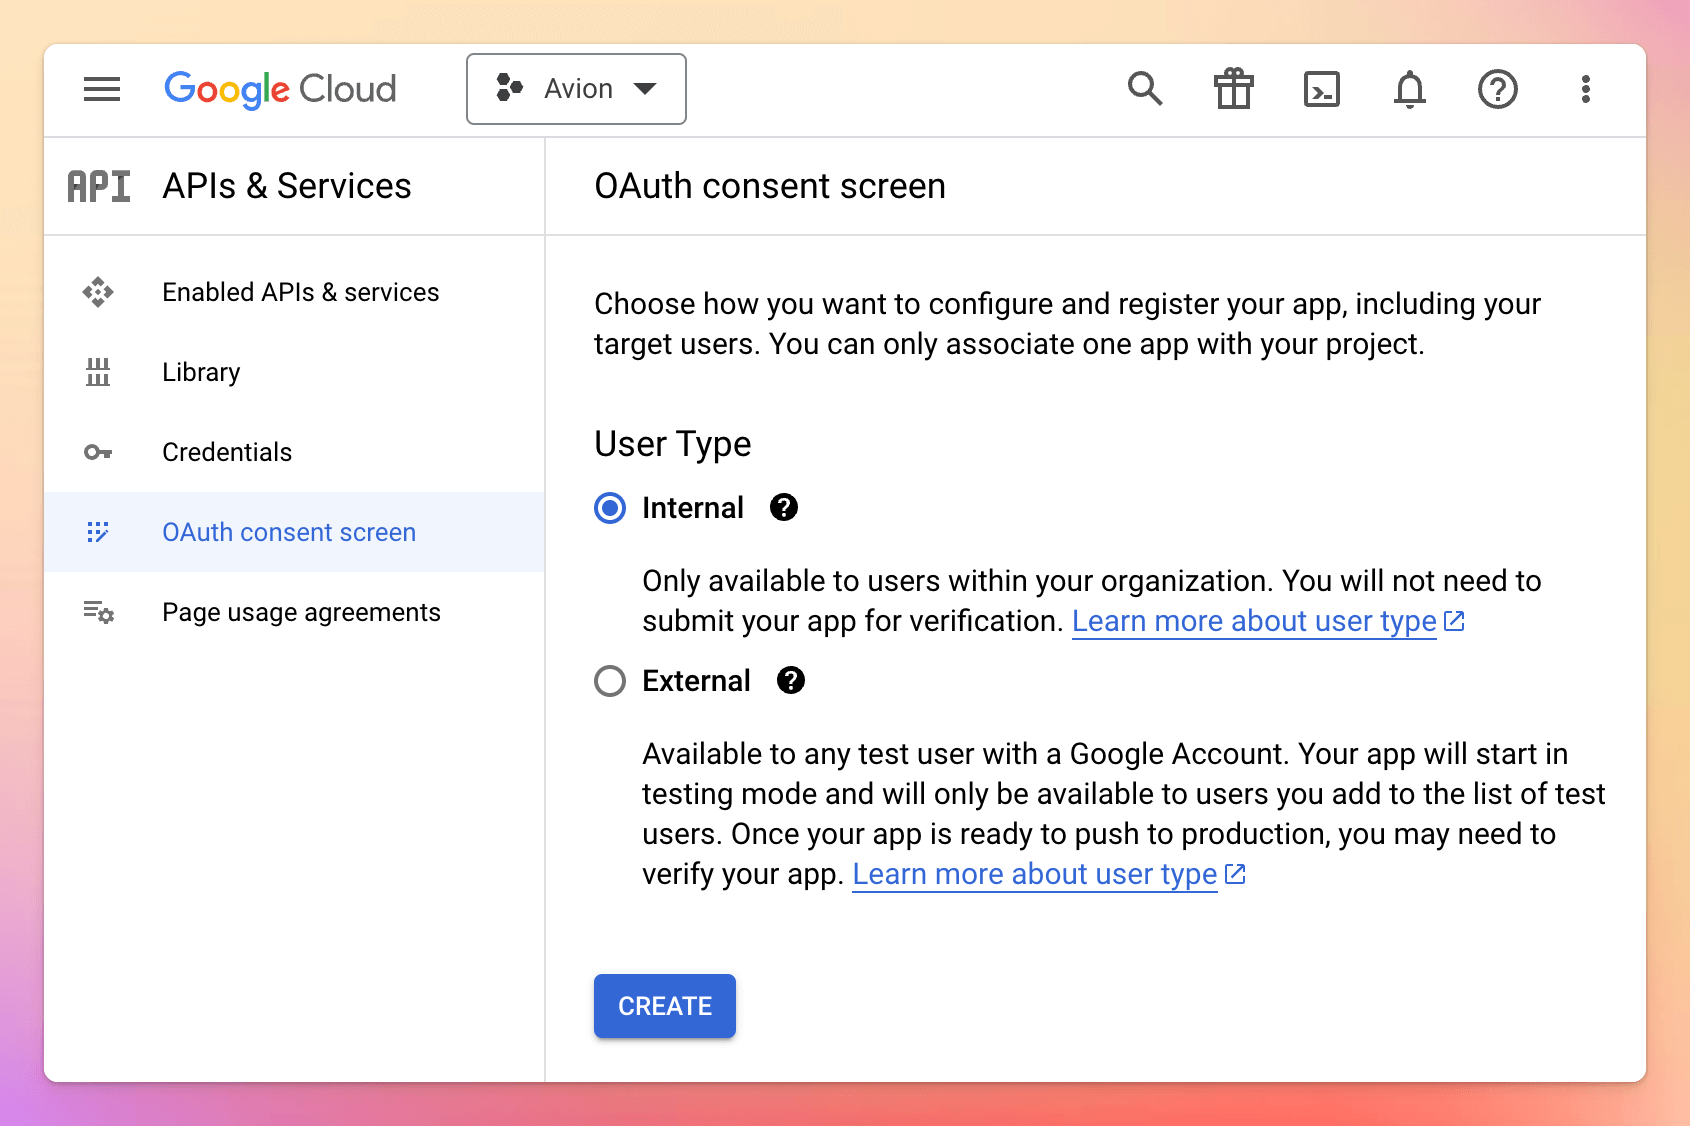
Step 2.2: Configure OAuth consent screen
- Under your chosen project, select OAuth consent screen from the left-hand menu
- Choose Internal as the User Type to ensure only users within your Google Workspace organisation can authenticate
- Click Create
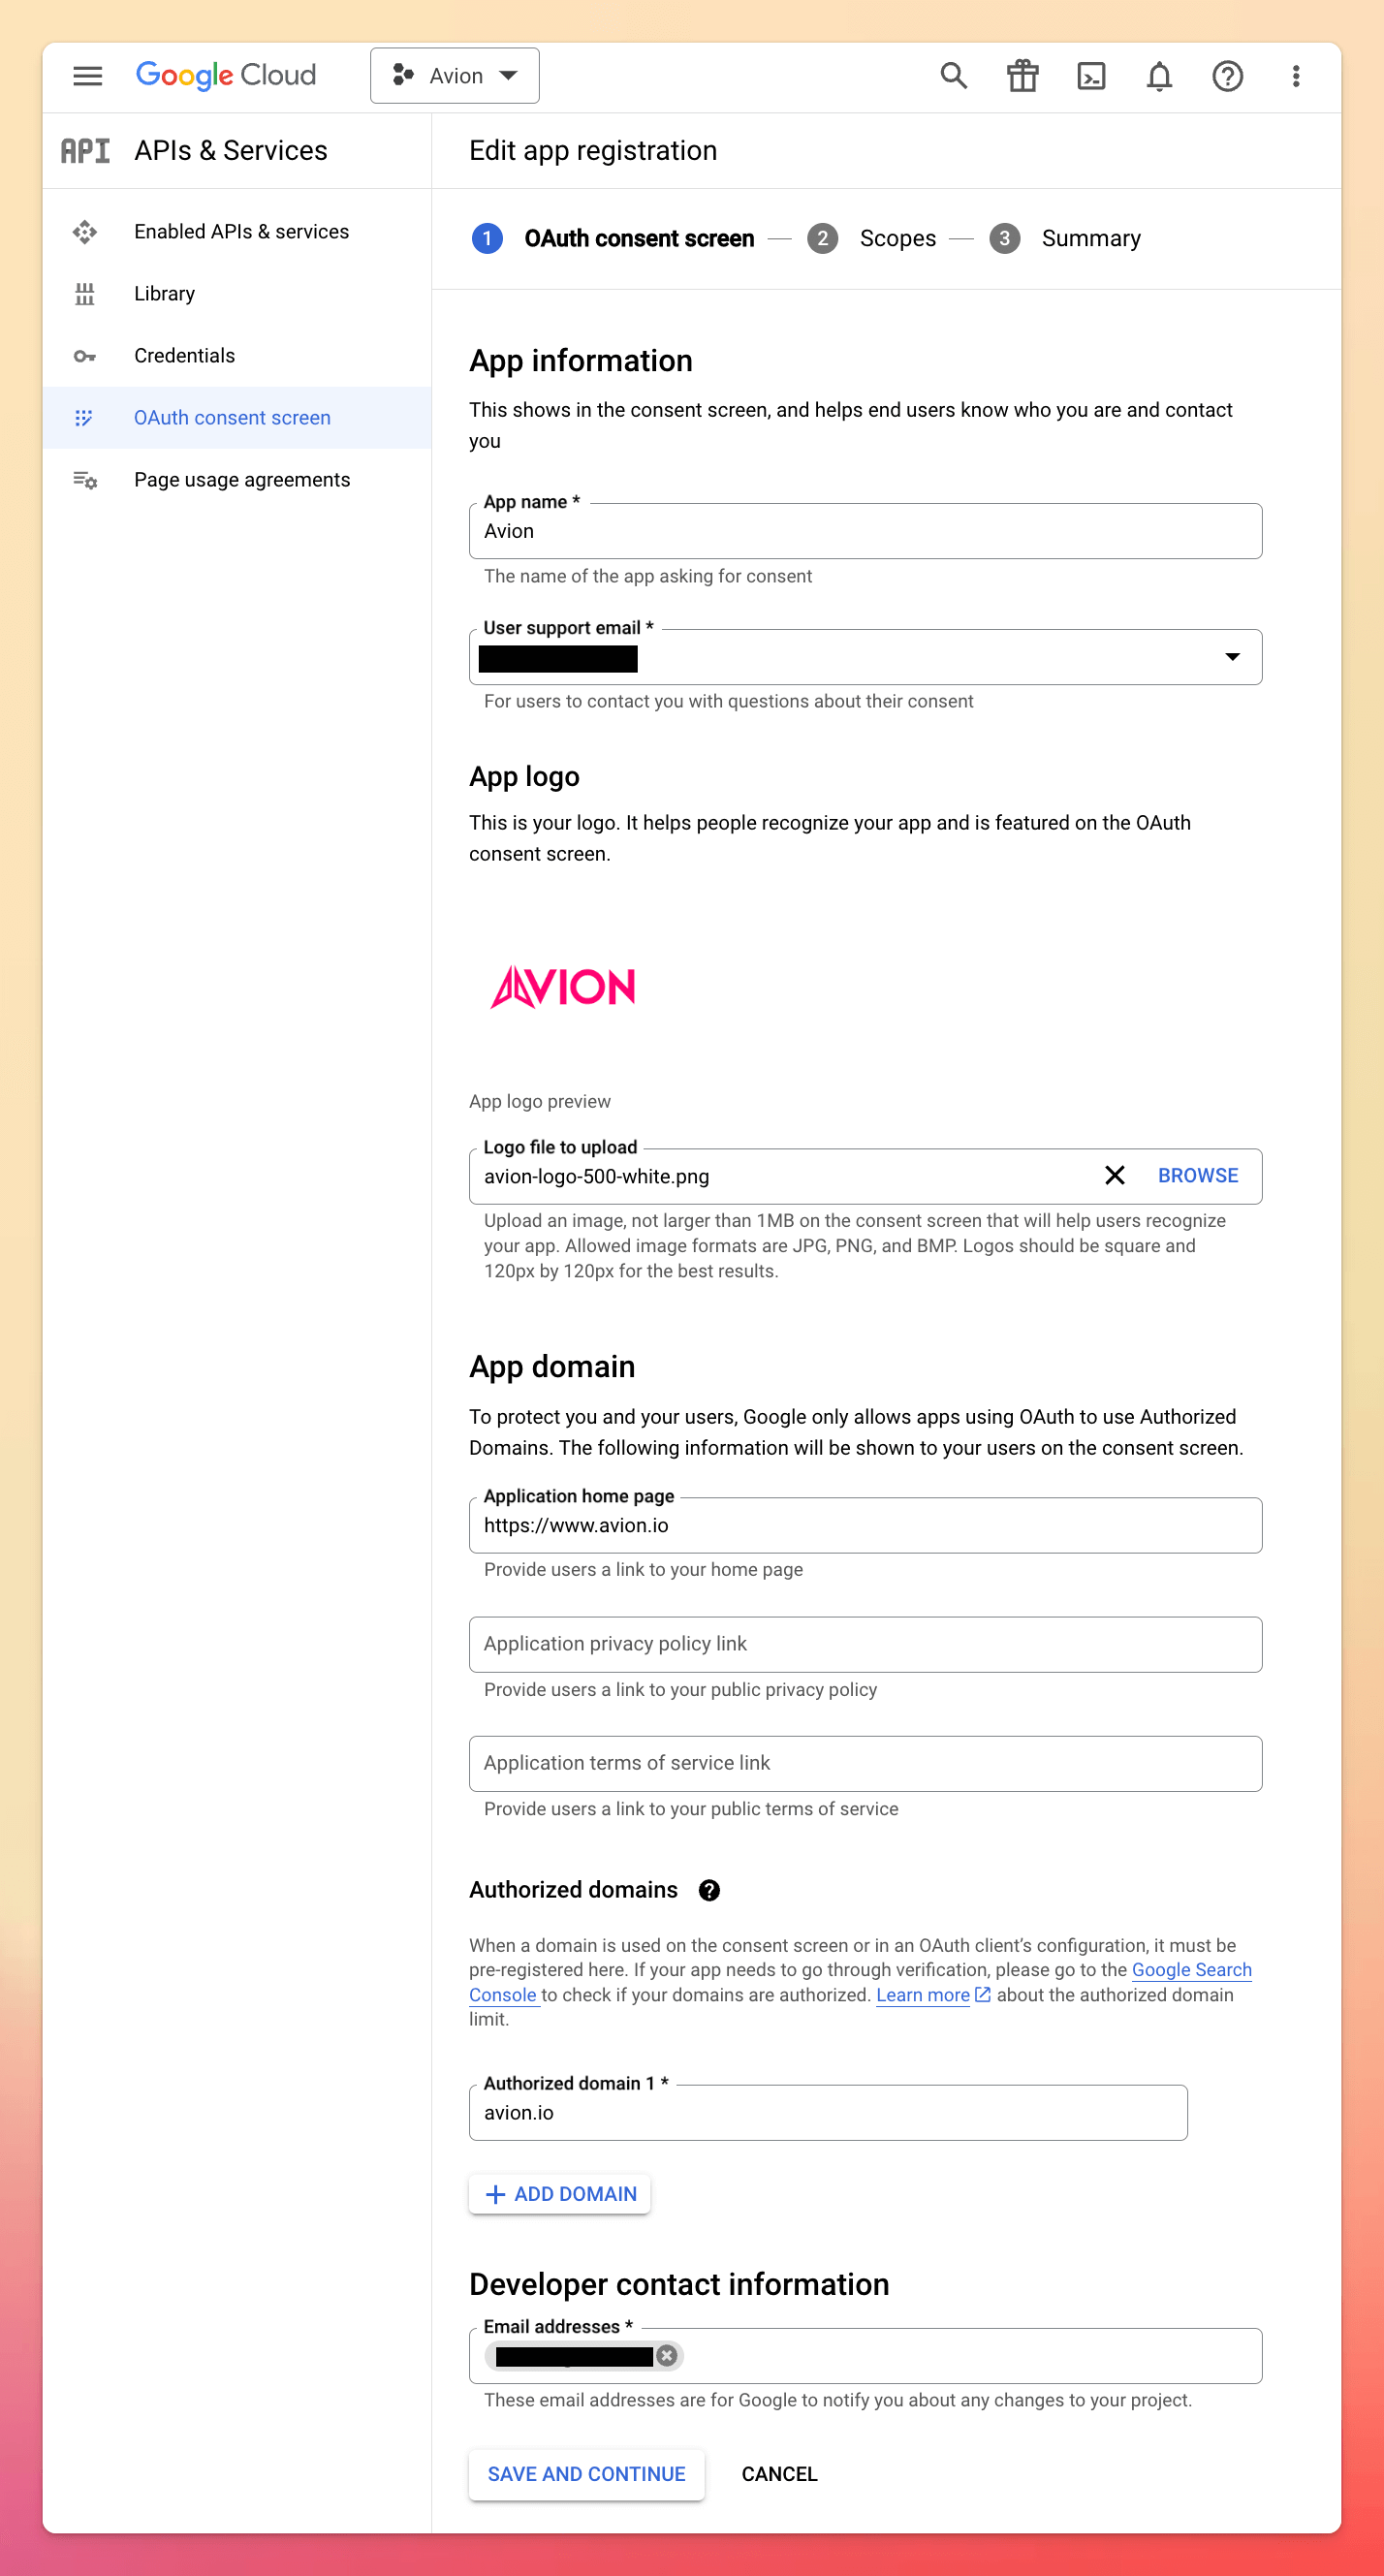
On the following App information screen, set the following values:
- App name: Avion
- Support email: Select appropriate option from dropdown
- App logo: Download the logo below and upload
- Application home page: https://www.avion.io
- Authorized domains: avion.io
- Developer contact email: Enter your IT team's email address
- Click Save and continue
- On the next screen, add the following scopes, then click Update:
- userinfo.email
- userinfo.profile
- openid

- Finally, click Save and continue
Step 2.3: Create OAuth client
- From the Credentials screen, click Create credentials and select OAuth client ID
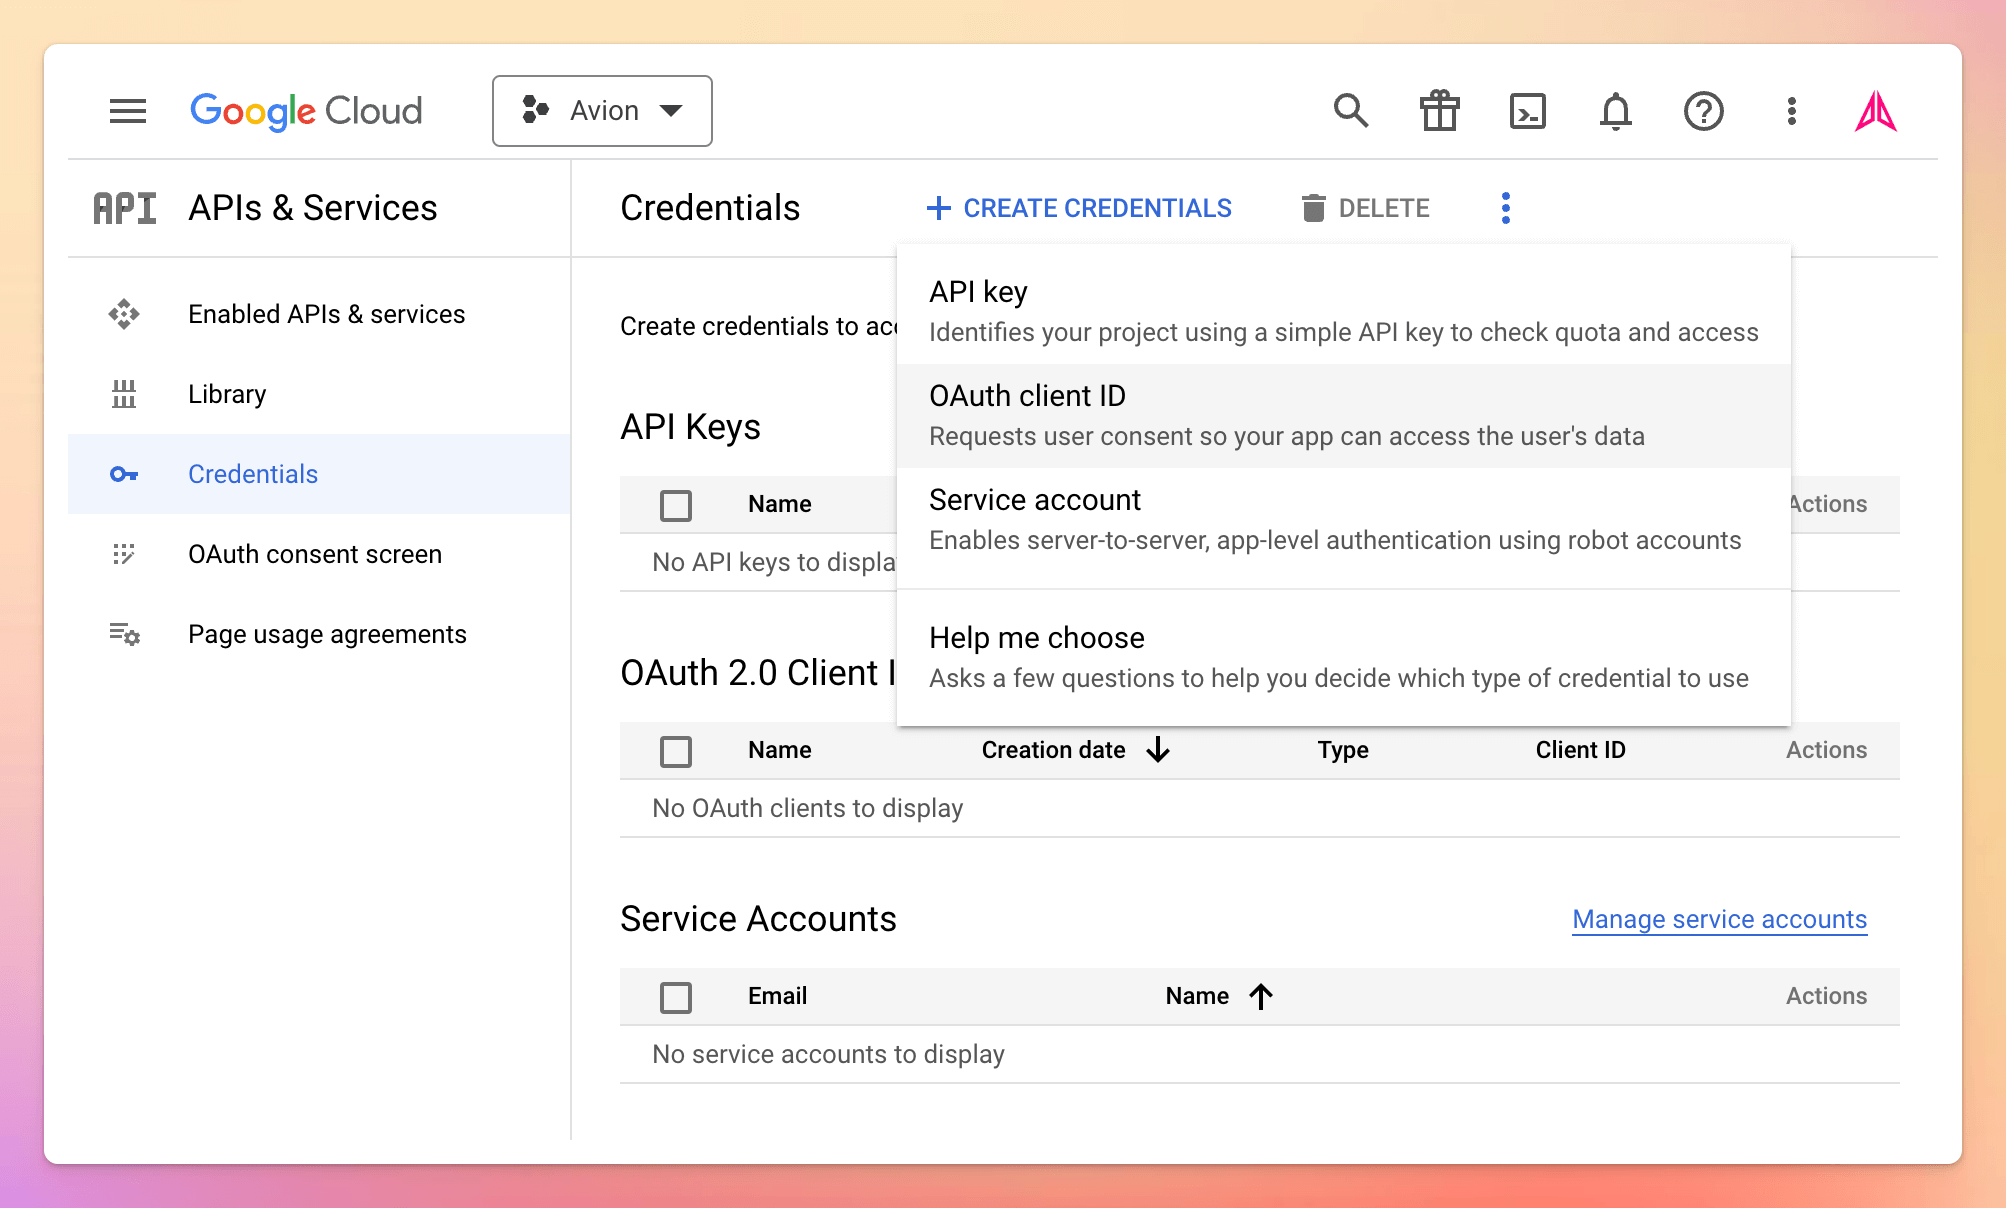
- On the next screen, set the following values:
- Application type: Web application
- Name: Avion
- Authorized redirect URIs: https://auth.app.avion.io
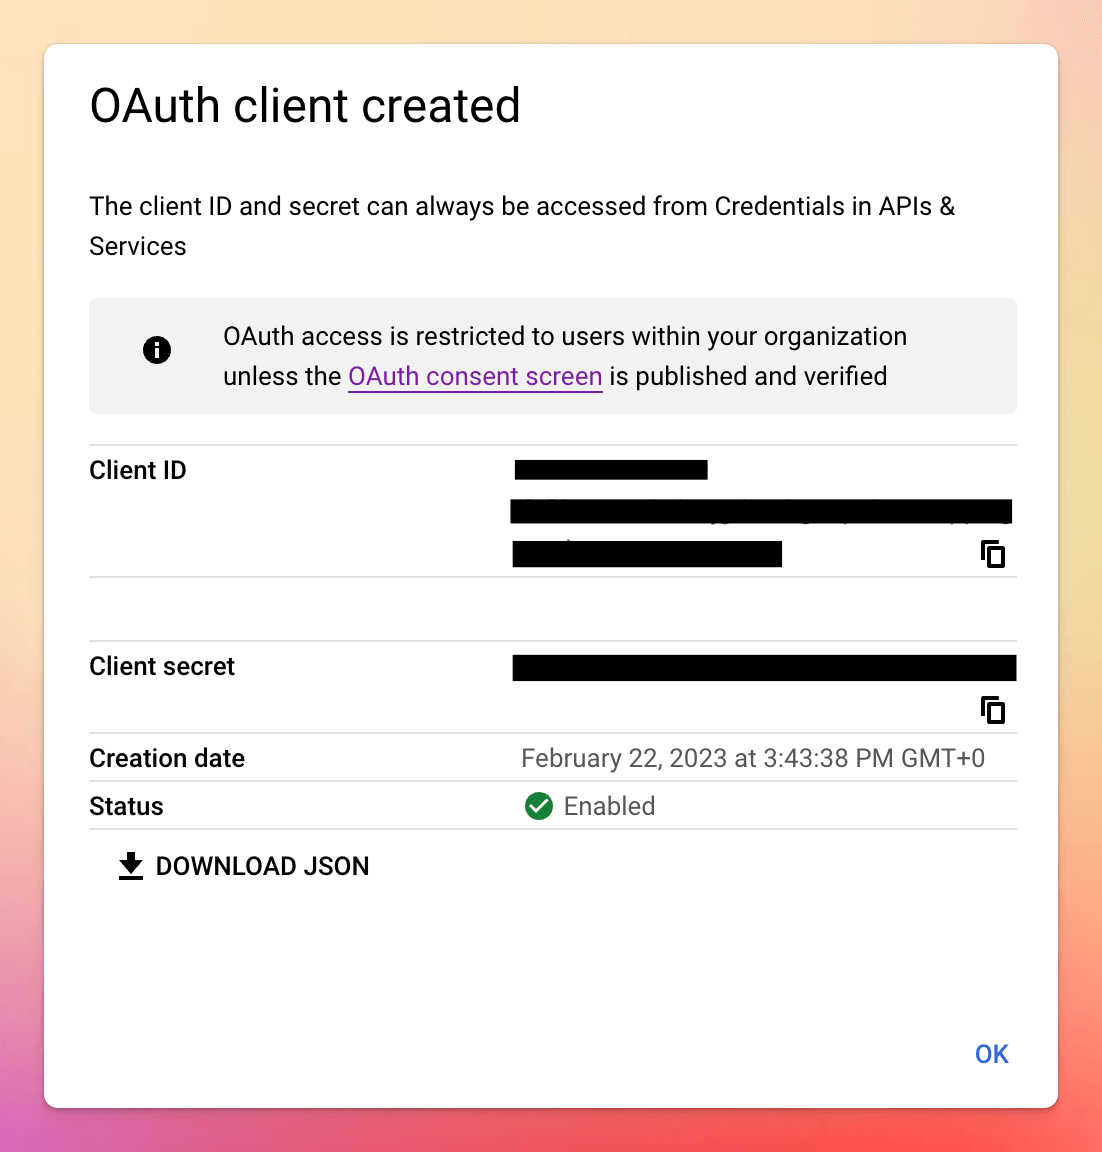
- Click Create
- Note down the Client ID and Client secret
Step 3: OpenID Connect setup form
Now all that's left to do is configure our OpenID Connect integration using the values obtained from Step 2 above:
- Client ID: use value obtained from Step 2
- Client secret: use value obtained from Step 2
- Auth endpoint: https://accounts.google.com/o/oauth2/auth
- Token endpoint: https://www.googleapis.com/oauth2/v3/token
- UserInfo endpoint: https://www.googleapis.com/oauth2/v3/userinfo
Once you have populated the setup form with the relevant details, hit Save Configuration and you're done!