OpenID Connect
Read about Avion's SSO integration with a custom OpenID Connect provider.
Step 1: Choose your SSO provider
In Avion, go to your organization's Single Sign-On section. Select OpenID Connect from the list of available providers:

Step 2: Configure SSO
To ensure a successful integration, Avion requires a Form POST redirect behaviour after authentication.
You will also need the following settings from your identity provider:
- Client ID
- Client Secret
- Authorization Endpoint
- Token Endpoint
- UserInfo Endpoint
Additional scopes (optional)
In order to successfully authenticate sign in requests, your OpenID Connect service must allow access to profile and email address information from your UserInfo endpoint. The shape of this data must follow OIDC specifications.
Avion already uses industry standard scopes by default, including: openid, profile and email.
However, if your service requires the use of additional scopes to allow access to this data, please ensure these are entered as a space-delimited string.
OpenID Connect setup form
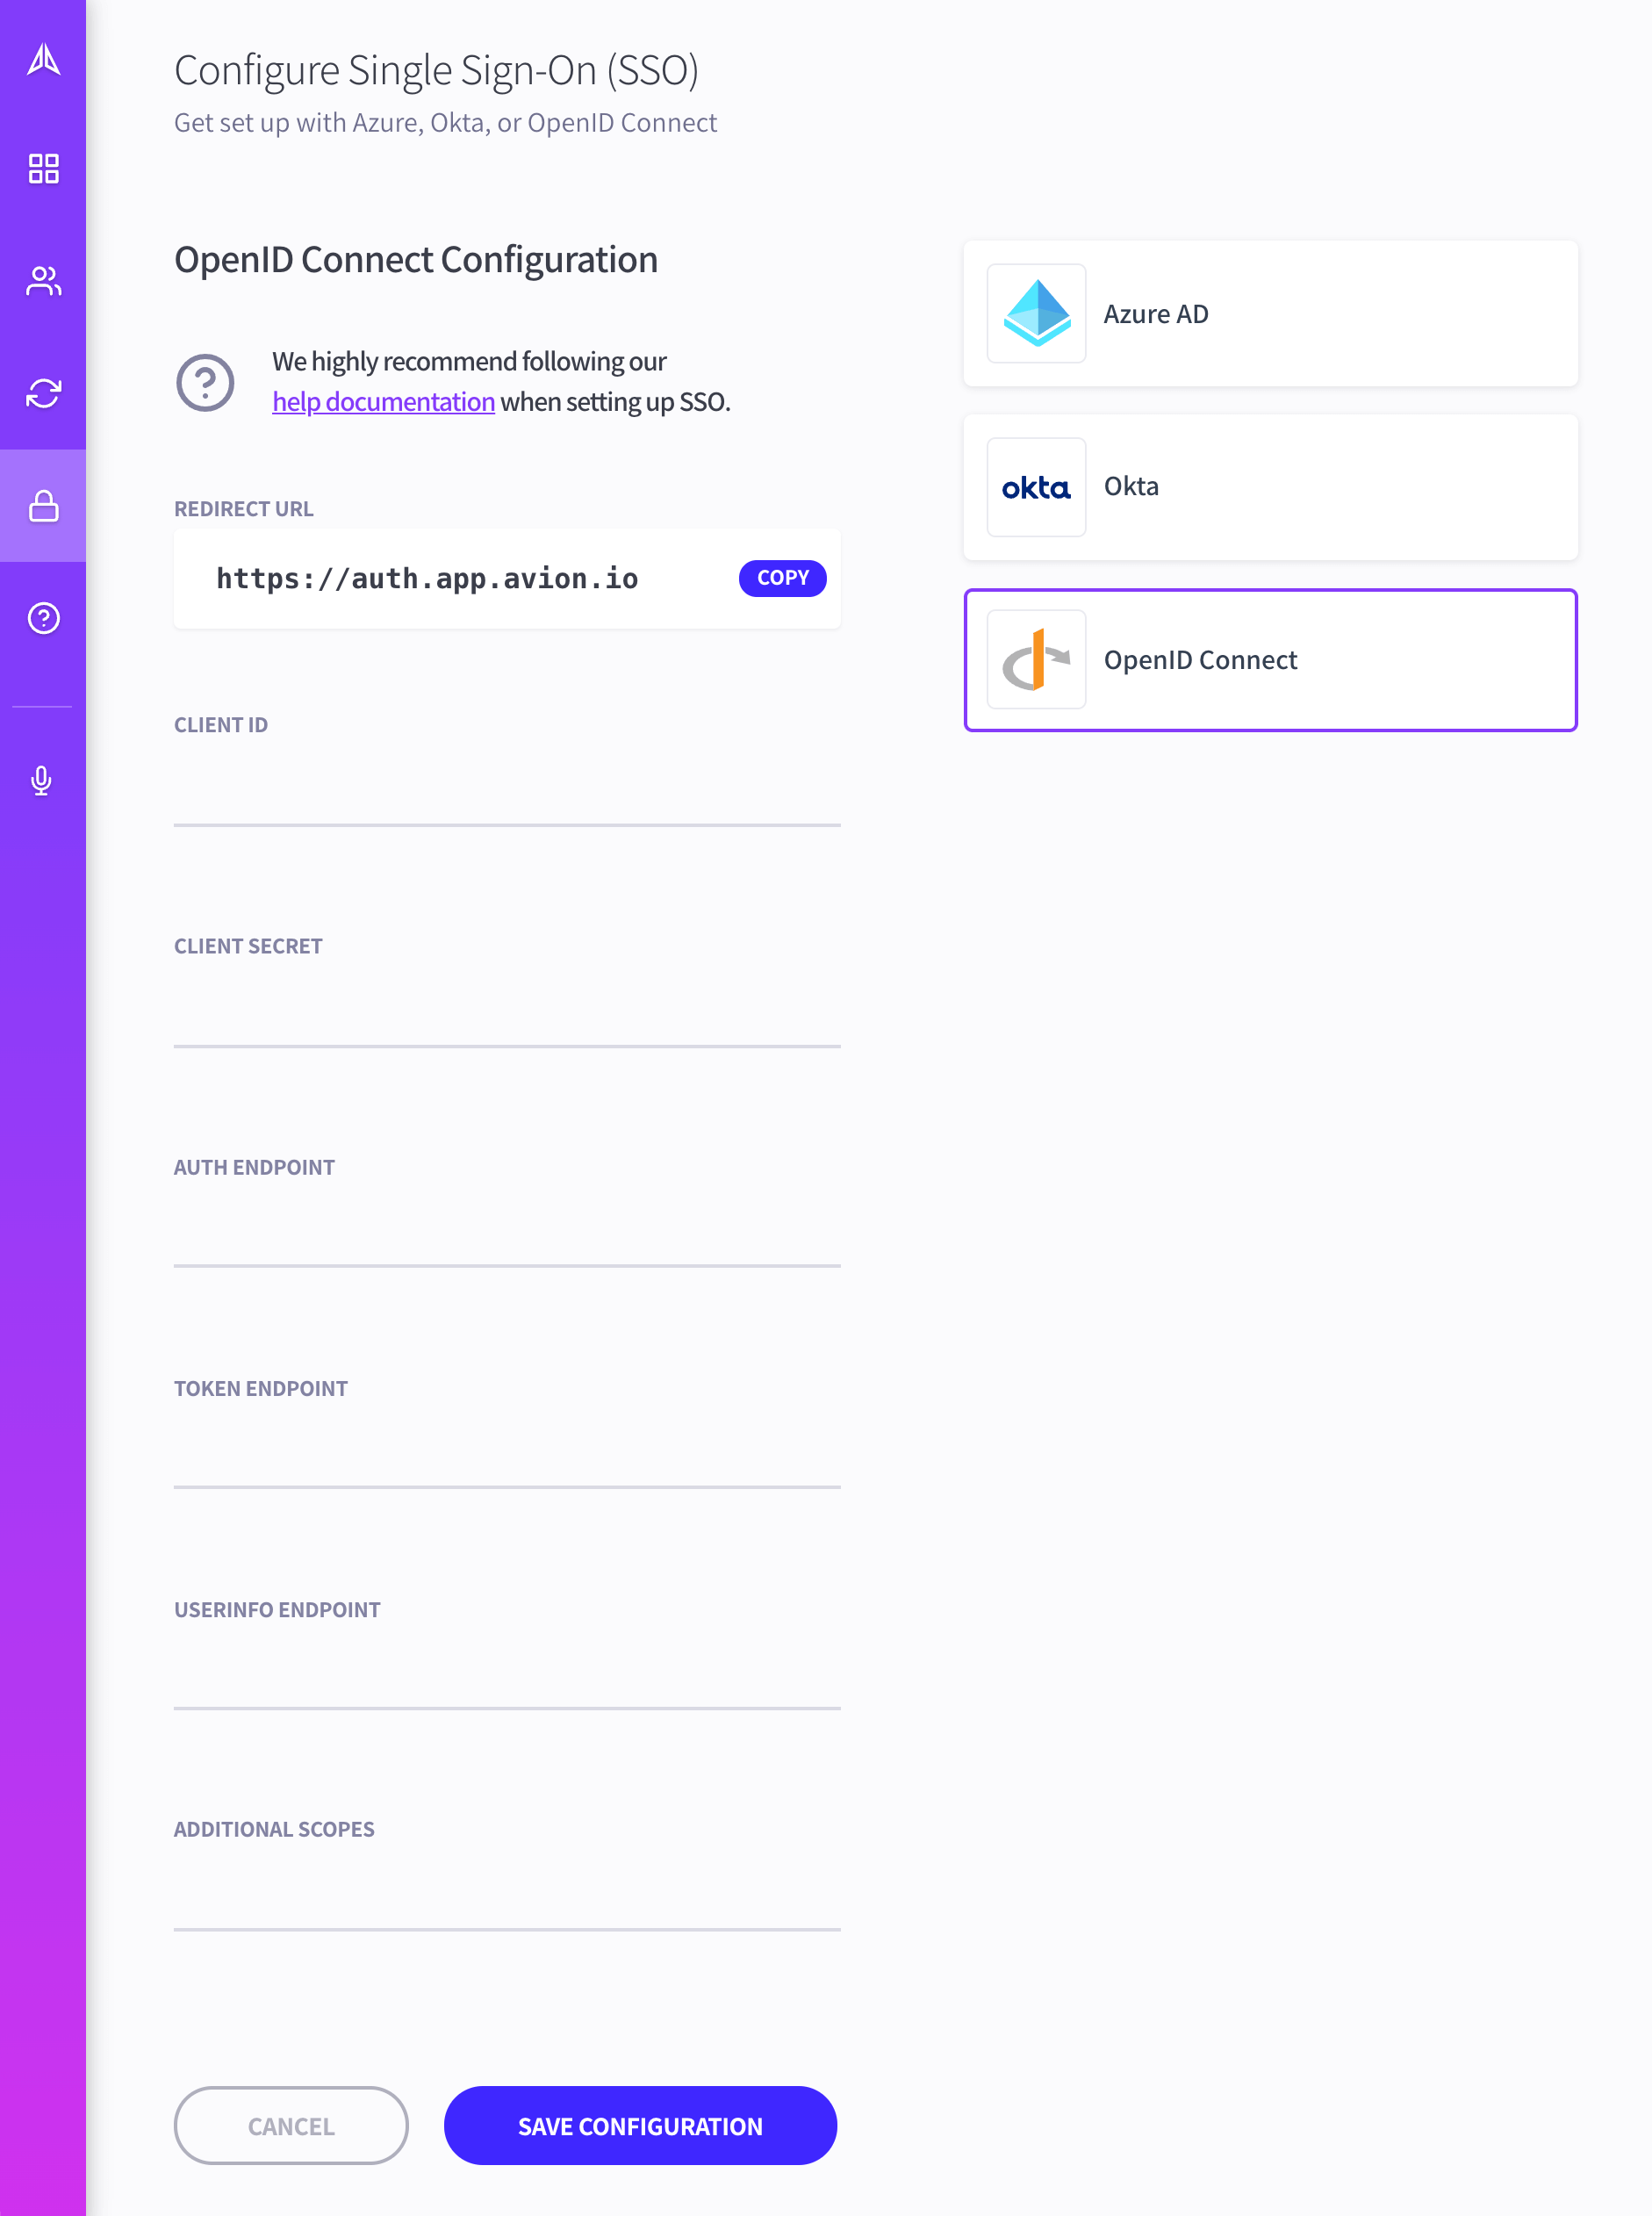
Once you have your OpenID Connect settings ready, populate the setup form with the relevant details, hit Save Configuration and you're done!